
Personalized communication is key to customer satisfaction, and it’s now easier than ever with Success Message Groups. This feature gives your team greater flexibility in customizing the automatic acknowledgements for different scenarios. By defining specific message groups and assigning them to relevant topics, you can tailor responses based on context or audience, enhancing engagement and customer delight.
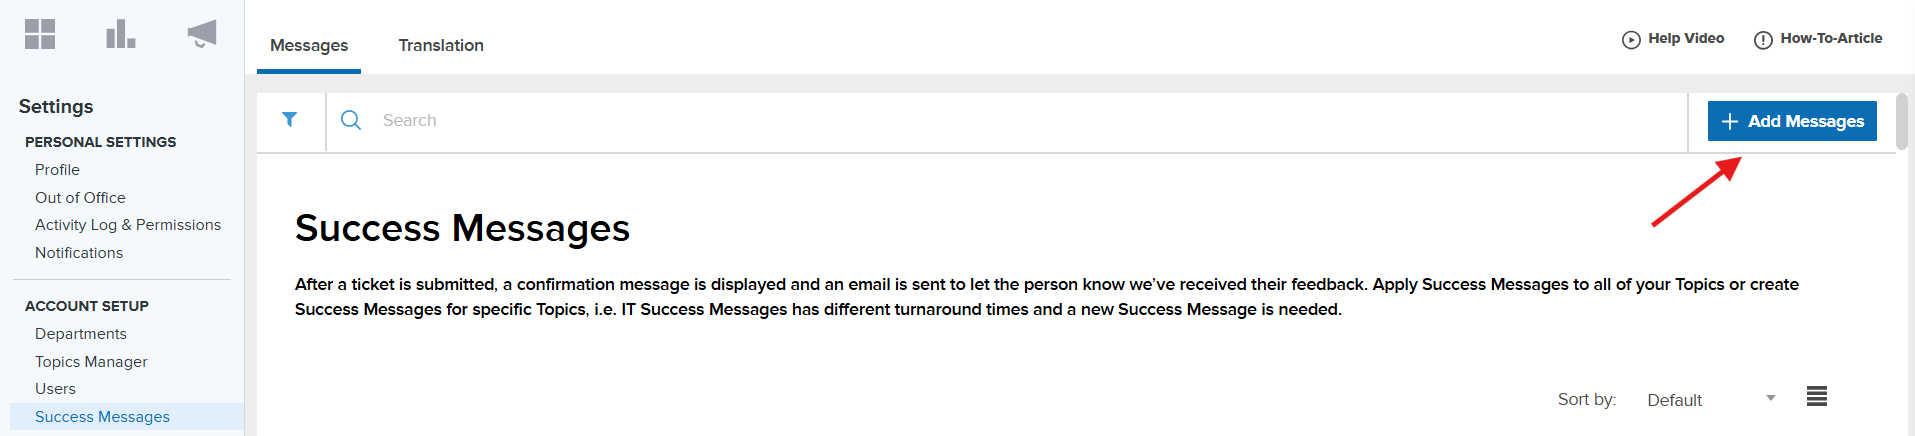
To view existing templates, or create a new Success Message, navigate to Settings > Account Setup > Success Messages.
Creating Success Messages
Create a new Success Message by clicking Add Messages.
From here, select the topic(s) to associate the Success Message with, then customize each of the following message types:
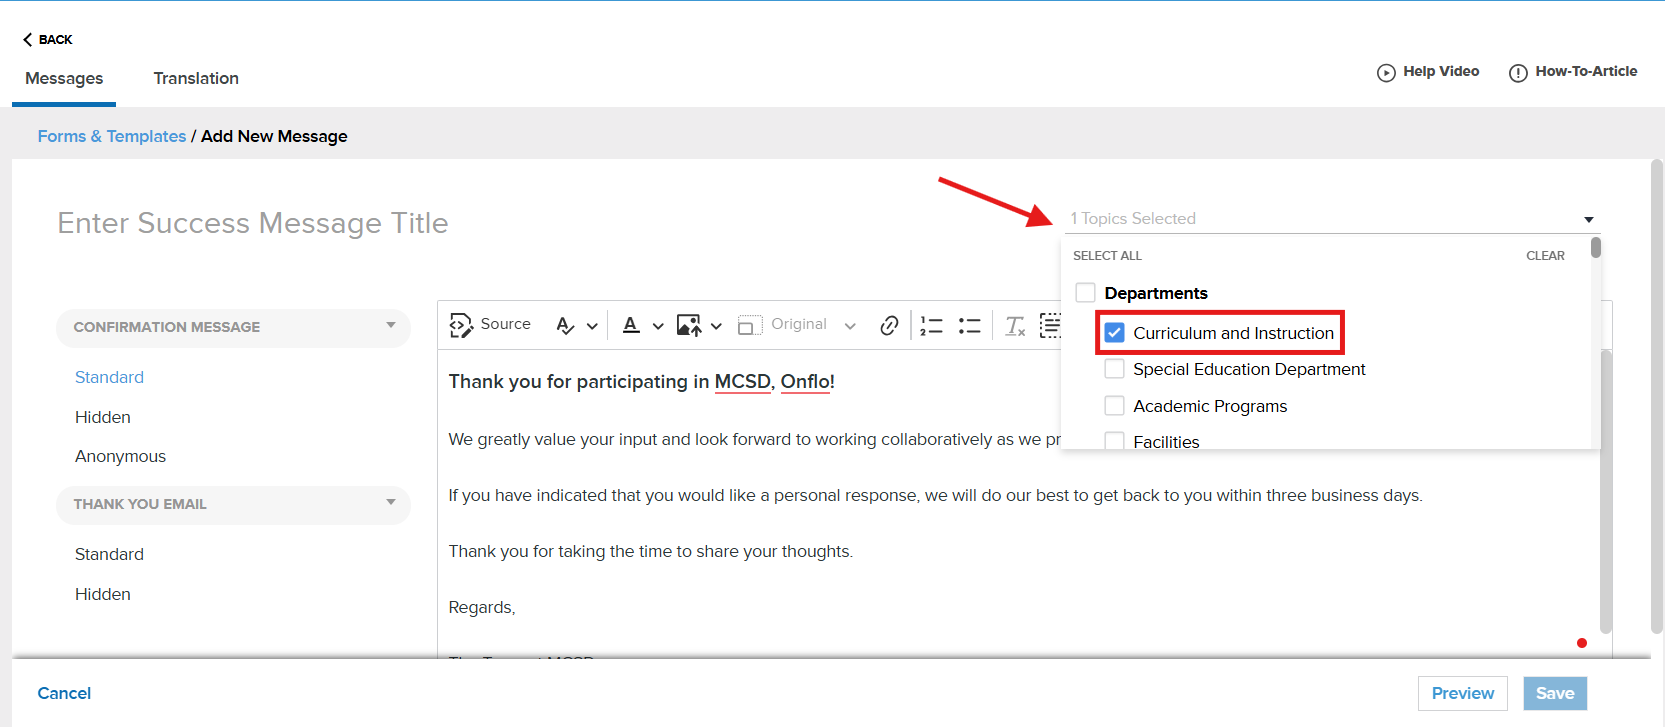
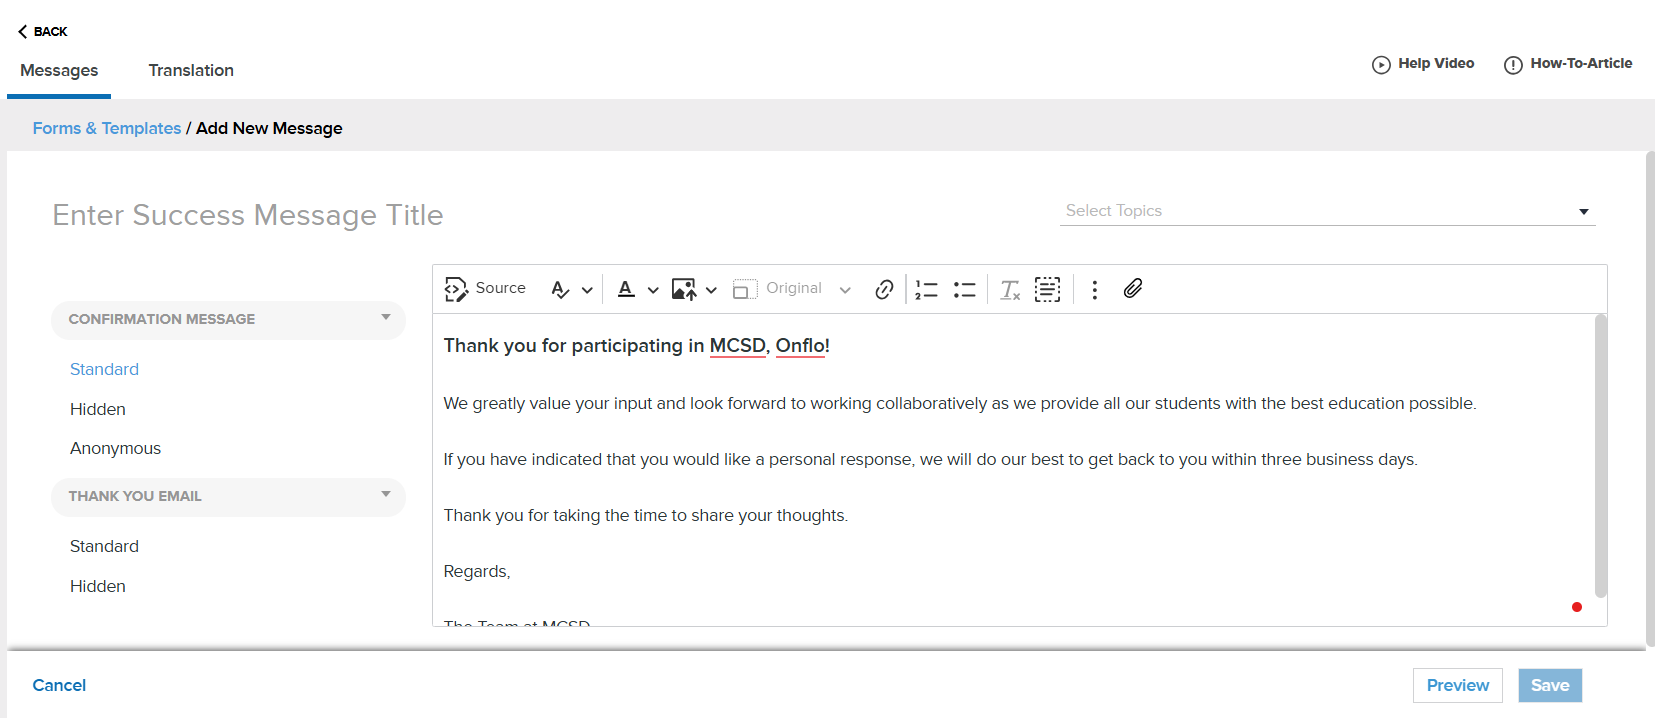
Once you have selected which topics(s) you would like the message assigned to you can begin composing your message to match the topic. Additionally, you can compose different messaging based on the type of customer who contacts your organization. Below we have listed the types of messages we offer:
On-Screen Confirmation Messages — appear on screen after a Customer has submitted a Ticket:
- Standard Customers
- Hidden Customers
- Anonymous Customers
Thank You Email — sent to a Customer who has provided an email address after submitting a Ticket:
- Standard Customers
- Hidden Customers
Features to Explore
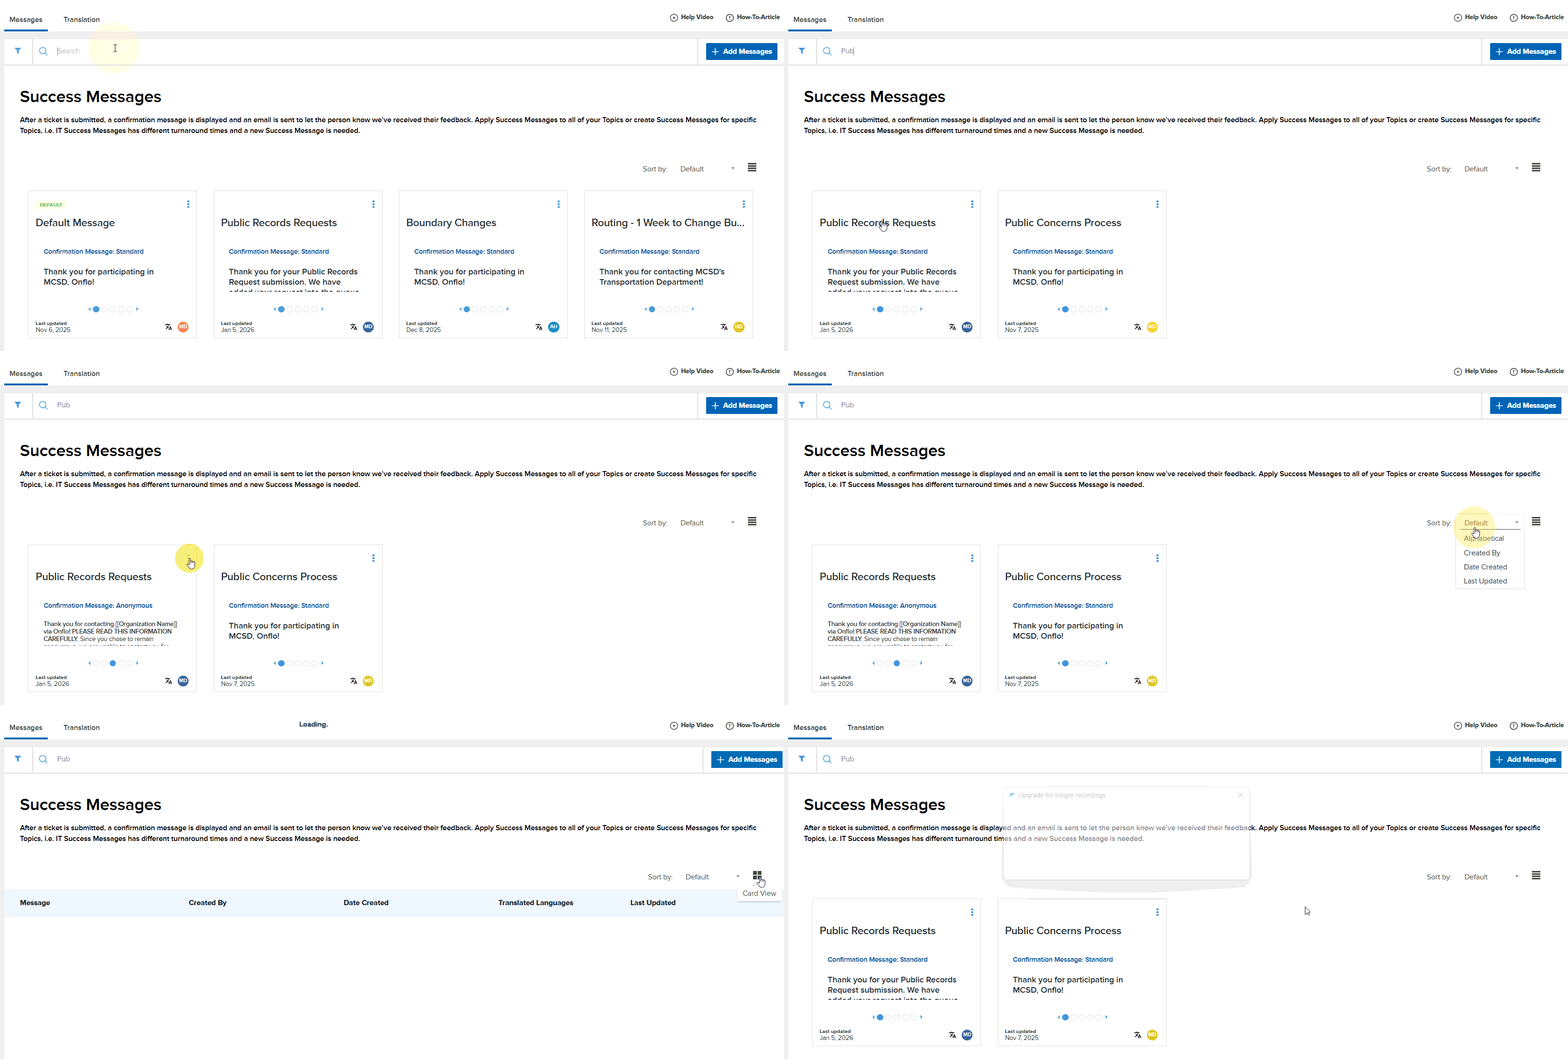
- View Type: Card View and List View options are available when viewing Success Messages.
- Review Messages: Click on the circles in each tile to view the every message for each success message
- Search Bar: Quickly scan each of the message types by clicking the right and left arrows when viewing a success message.
- Sort/Filter: Success Messages can be sorted and filtered using multiple criteria:
- Alphabetical
- Created By
- Date Created
- Last Updated
- Translated Languages
- Edit Options: Copy, Delete, or assign a Default Success Message by clicking the ellipsis at the top right corner of the success message.
Translating Success Messages
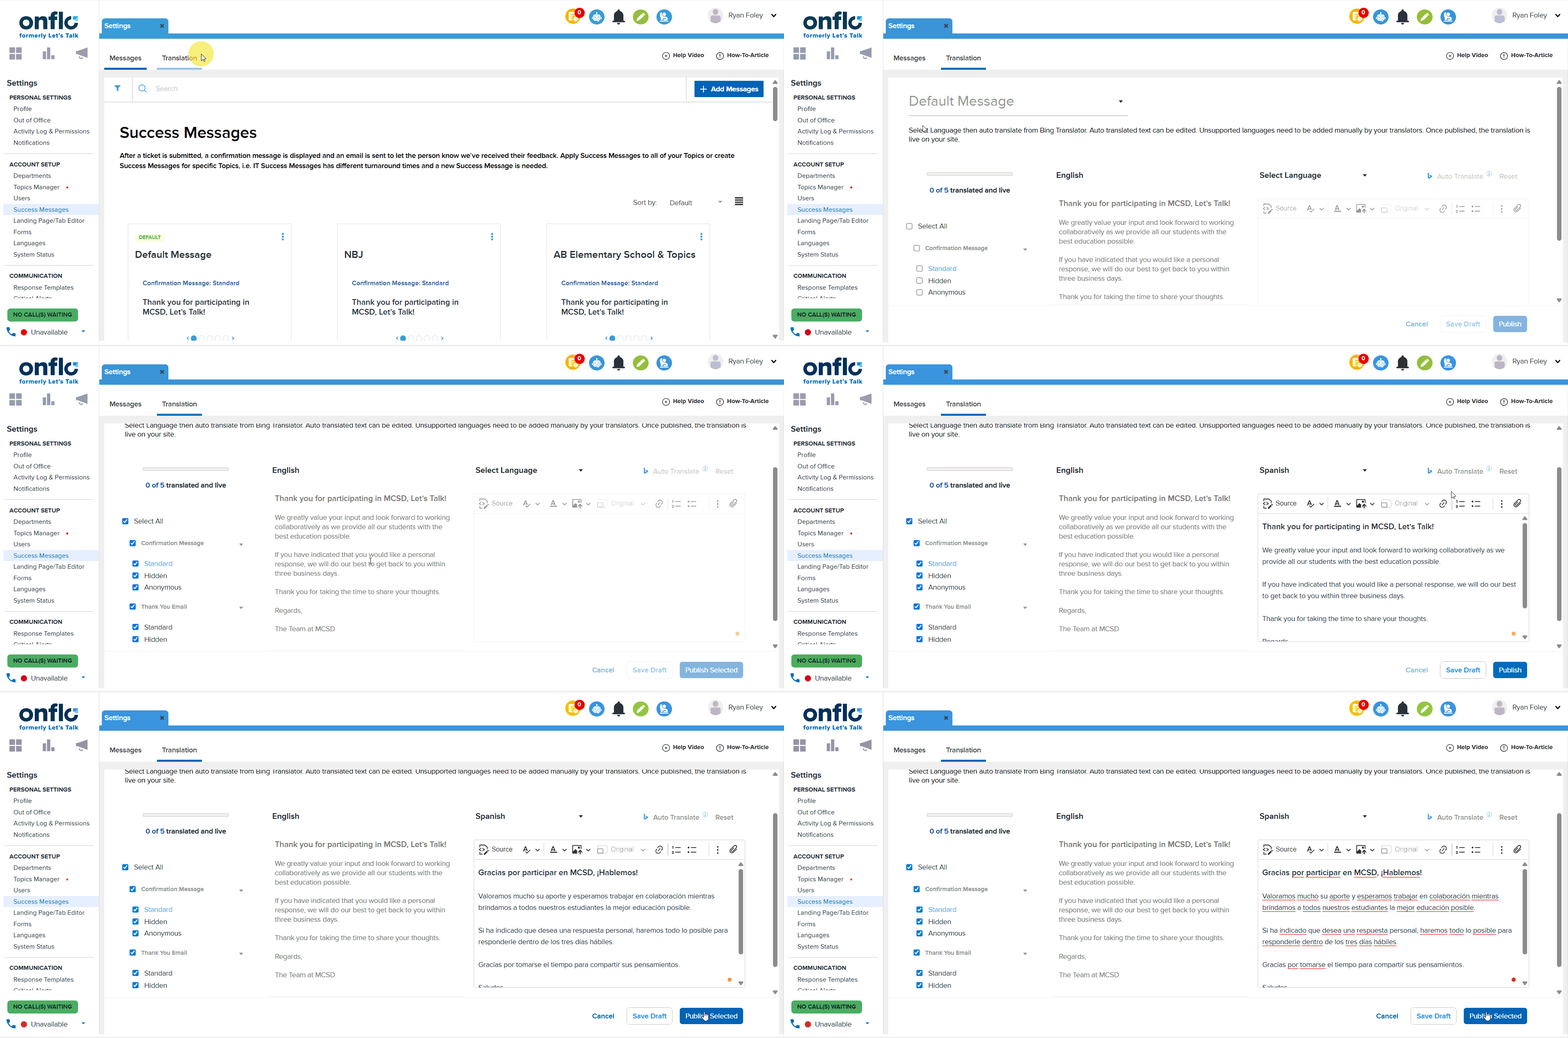
Easily toggle from Messages to Translation within Success Messages to translate your messaging. Select a Success Message from the dropdown and add translated content to match it. Use auto-translation to translate your content with the click of a button!
How to Translate Success Messages
- From the Success Messages tab, click Translate
- Select the message you would like to translate from the drop-down menu (ex. "Greeting")
- Click on the message(s) you wish to translate.
- Check the box next to the message (Confirmation or Email) and customer type (Standard, Anonymous, Hidden). You can also click Select All, and this will allow you to translate all content for this Success Message.
- Select the language you would like your message to be translated to from the drop-down menu
- Click the Auto Translate button
- Click Publish Selected or Save Draft if you are not yet ready to publish these messages, but need to save your progress.
Note: Customers with Anonymous submissions will not receive Thank You messaging