
Notifications give you the updates you want — when you want them, and how you want them. Set your preferences and never miss a beat!
Note: Notifications are user-specific. Each User can set preferences to receive notifications via email, via mobile app push notifications, or in the Notifications section of the Onflo (formerly Let's Talk) account. System Administrators cannot update notifications for other Users.
Customize Notifications
- To access Notifications Settings, click on your name at the top right-hand corner > Settings
- Under Your Settings, on the left-hand side of your screen, click on Notifications.
- By default, you’ll see your Notifications Stream. Learn more about this area below.
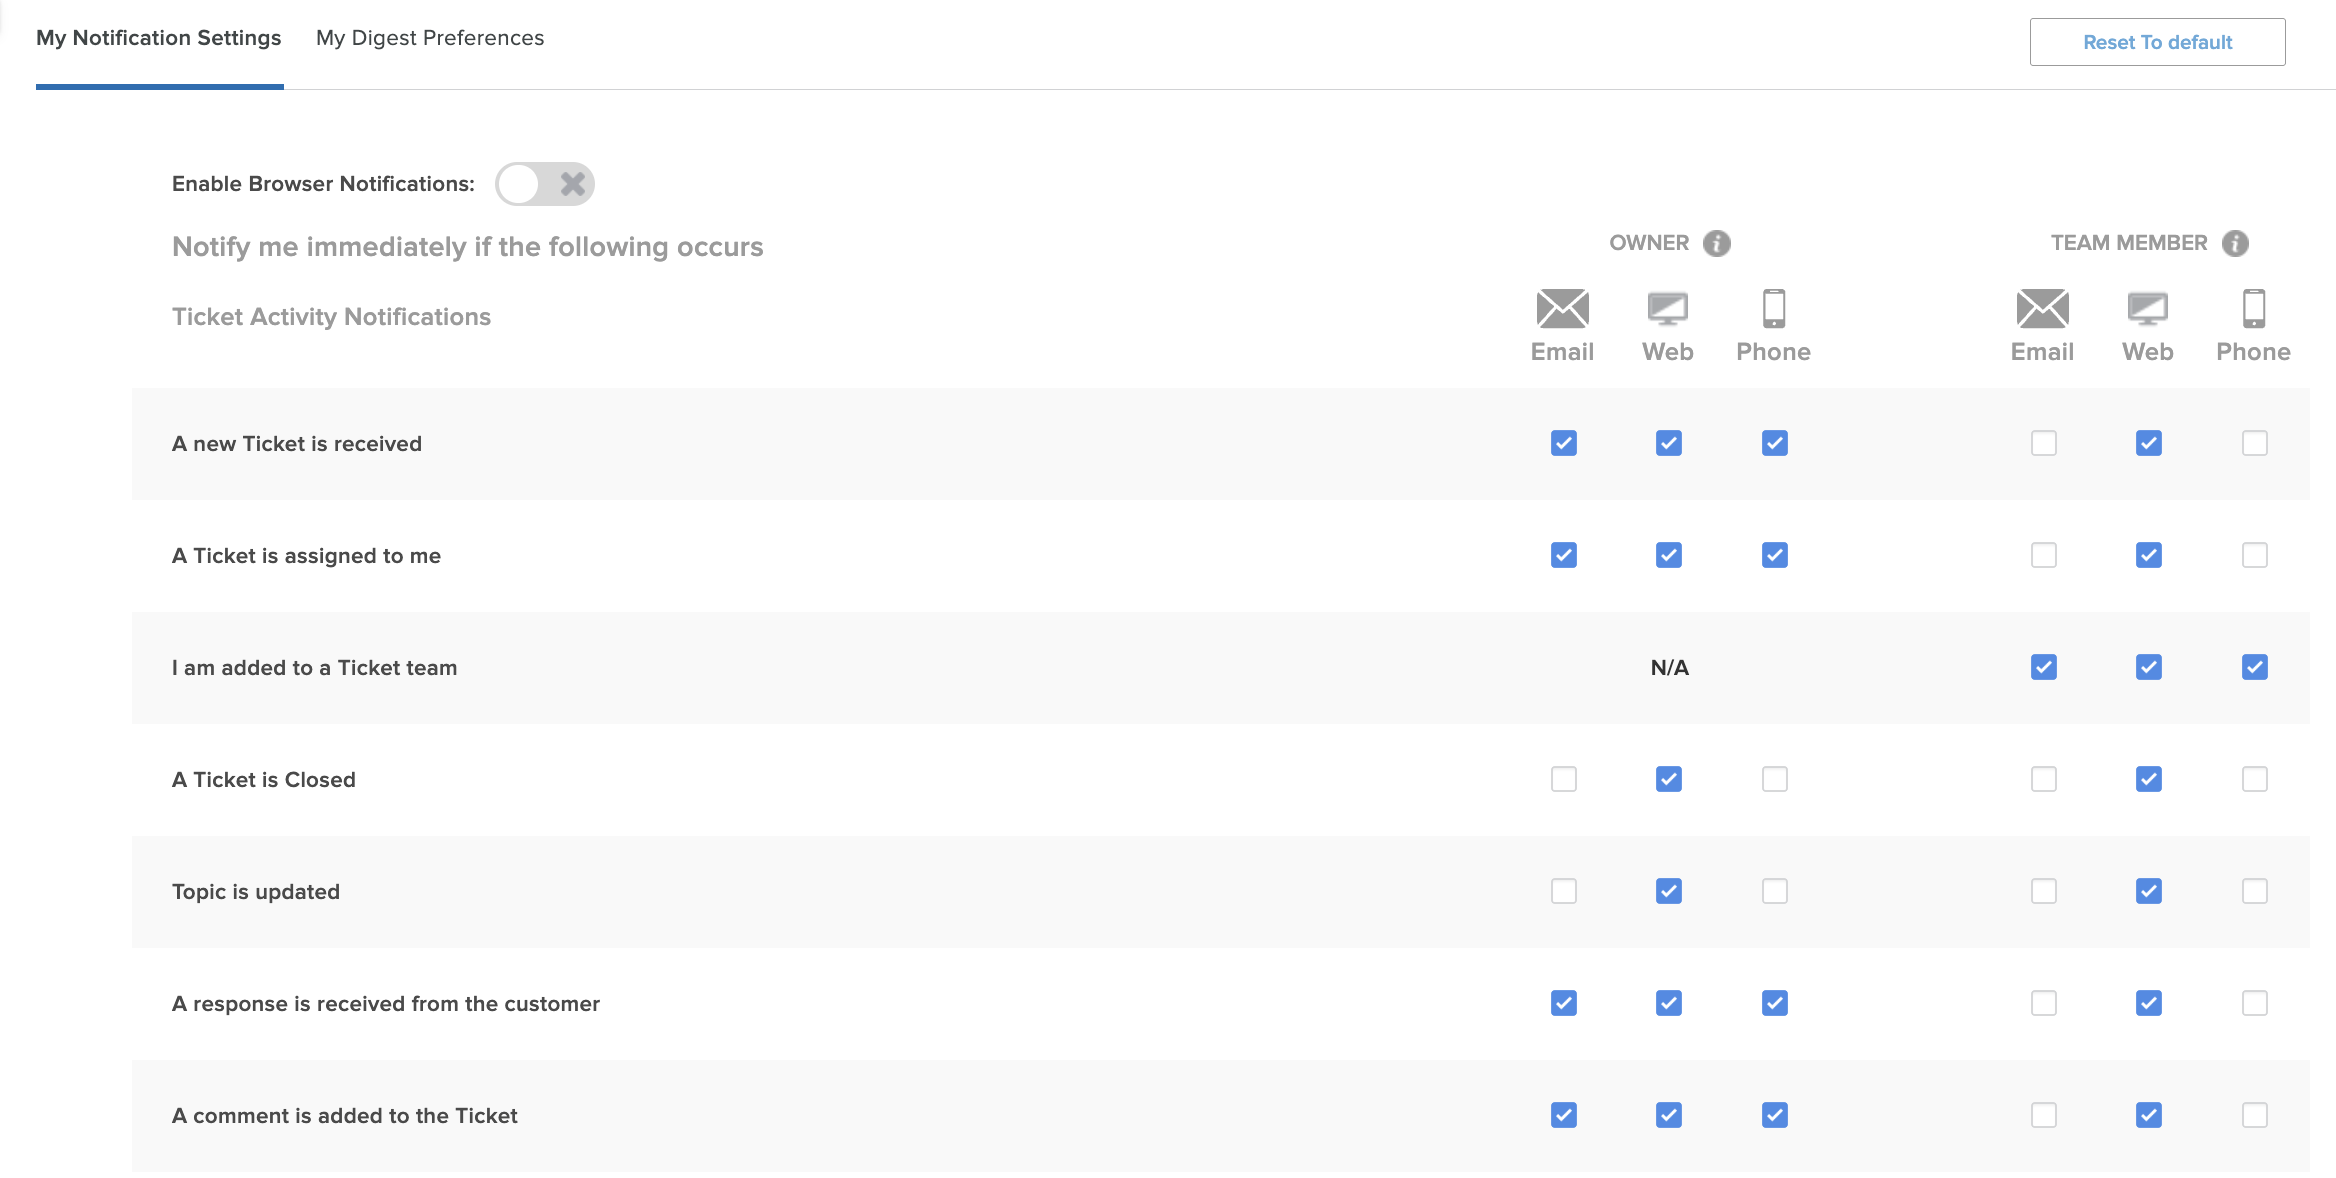
- Each item listed along the left is a triggering event, with each of the icons to its immediate right representing a mode of notification for the Ticket’s Owner or Team Member: Email, Web, or Push (Mobile).
- To remove an event completely, deselect the checkmark to its left.
- To turn a specific alert on or off, simply click on the relevant icon. Green means active and gray means inactive.
- Click the Save button in the top right-hand corner to confirm any updates.
Note: Click the “Reset to Default” button in the top right corner to restore notification settings back to your organization’s default selection.
What Activity is Tracked?
The Notifications section captures the following activity and changes to Tickets:
- New Ticket received
- Ticket assigned to User
- User added to Ticket team
- Ticket closed
- Topic updated
- Response received from Customer
- Internal comment added to Ticket
- Ticket priority updated
- Feedback score received from Customer
- Ticket is Past Due
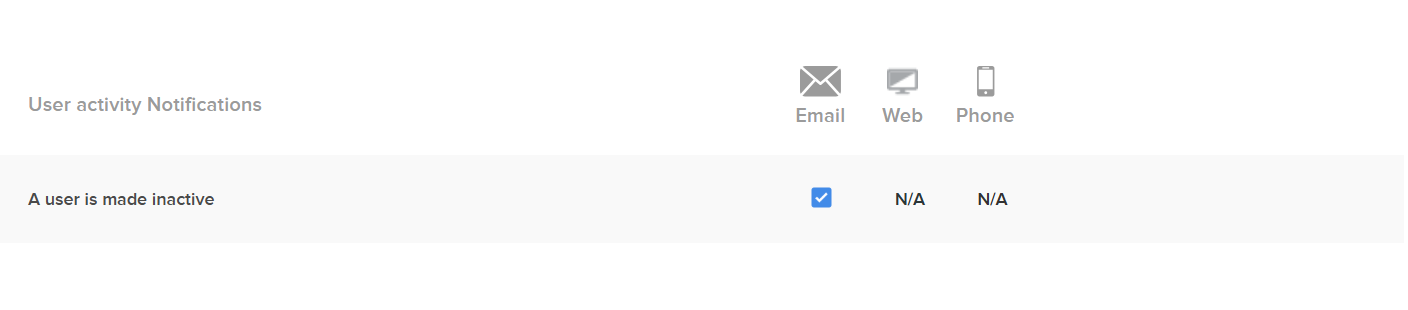
System Administrators have the option to enable a notification to be alerted when a user is made inactive. The notification is currently only available via Email.
Notifications Stream
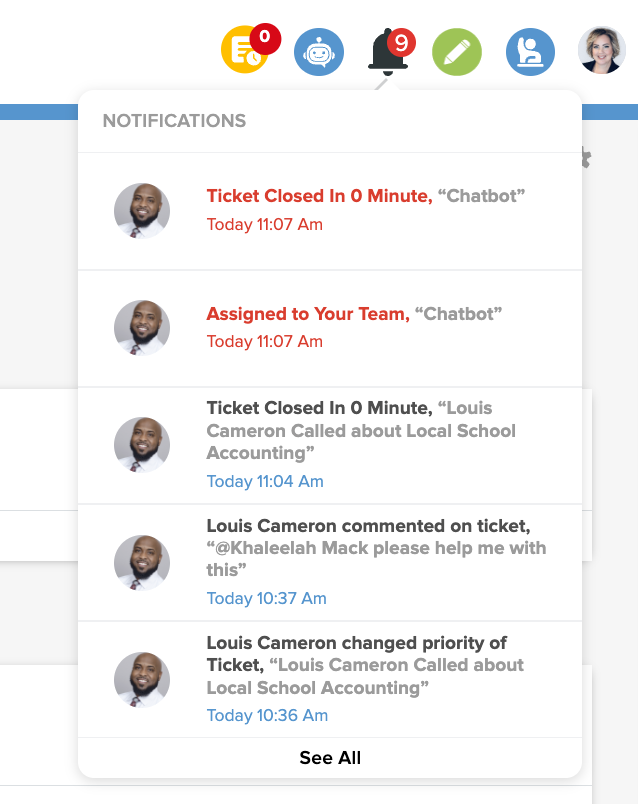
- Both web and mobile versions of Onflo include a notifications section.
- On the web, your notifications will appear in the bell icon found at the top right-hand corner
- The number next to the bell icon indicates the number of new notifications you currently have.
- Click on the bell icon to reveal a quick view of the current notifications.
- Click on any notification to take you to the respective Ticket.
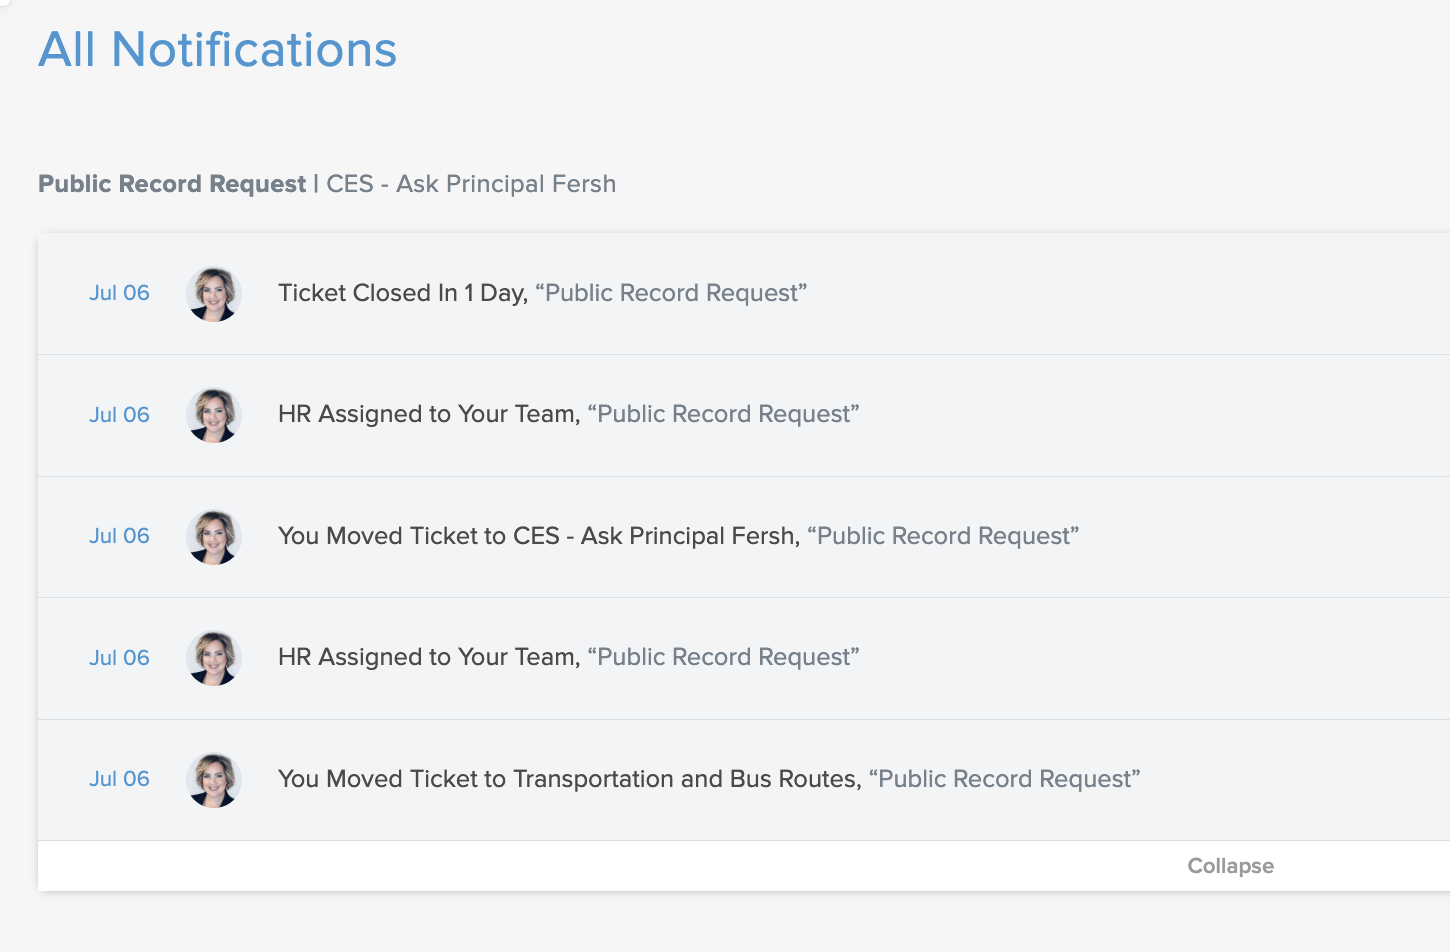
- Click See All to go to a full-screen notification page to review all notifications in detail, mute certain tickets or delete the notifications.
- On the top right-hand corner of the full-screen page, click on the cogwheel icon to customize notification preferences.