
Campaign Manager allows you to engage your community quickly and easily, sharing out messages and welcoming feedback directly to Onflo (formerly Let’s Talk) – all in one convenient place. In coordination with district team members, System Administrators and Topic Owners can roll out communication campaigns whenever the need arises.
1. Be Prepared
Contacts
Who's your audience - parents? staff? students? community members?
Click Contacts, then New.
- Create List to add options manually.
- Create Sub-List to divide your list for more specific messages.
- Create List from Topics to send a campaign to all customers that have submitted a ticket to specific topic.
- Add Contact to existing lists.
- Import Contacts walks you through the process of importing an Excel spreadsheet of your contacts to create a new list or add to an existing list. You'll be provided with a Contact Template for accurate formatting.
Review your lists and update as necessary.
Templates
What's your message/purpose?
Click Templates, then select Basic, Saved, or Sent Campaigns. Preview any images for a larger view.
- Select a template to customize.
- Click anywhere on the message to edit text and colors, add links and images, and make it your own.
- Preview to see how the message will look in browser and mobile inboxes.
- Save As to name for future use.
- Sent Test Email to review and share with colleagues.
2. Launch
Create Campaign
Click Campaign Dashboard, then Create Campaign to step through the wizard.
- SETTINGS covers the basics: an internal Campaign Name, a concise and engaging Subject, a recognizable Sender, and a Reply-to email. By default, you'll see a donotreply address, to encourage participants to respond through Onflo links.
- TEMPLATES allows you to Preview, then Select the design of your choice.
- In EDIT/VIEW, click anywhere in the message to edit, then Preview to check your work. Save As and Send Test Email as desired.
- CONTACTS asks you to select from one of your Lists, or Add Contacts.
- SCHEDULE offers three different options: Send now, Send later, or Trickle Schedule, which includes variations -
- Trickle By Contact Volume (designate number of messages delivered per day)
- Trickle By End Date (spread evenly)
- Exclude weekends and holidays as desired
- SUMMARY lets you review and Edit, then Save and Exit if you'd like to come back later or Create to put your campaign in motion now.
3. Review Results
Campaign Dashboard
Click Campaign Dashboard, then scroll down to see Overview, followed by each campaign and its relevant statistics.
Overview:

The overview will show you the total campaign numbers for the account. That includes
- Total # of emails sent
- Total # of emails delivered
- % of emails opened
- % of emails delivered, but unopened
- % of emails bounced (never reached intended inboxes)
- From the opened emails, you can also tell:
- % of clicks
- % of users who unsubscribed to campaigns
You can also find these statistics for each campaign by scrolling down to see them separated:
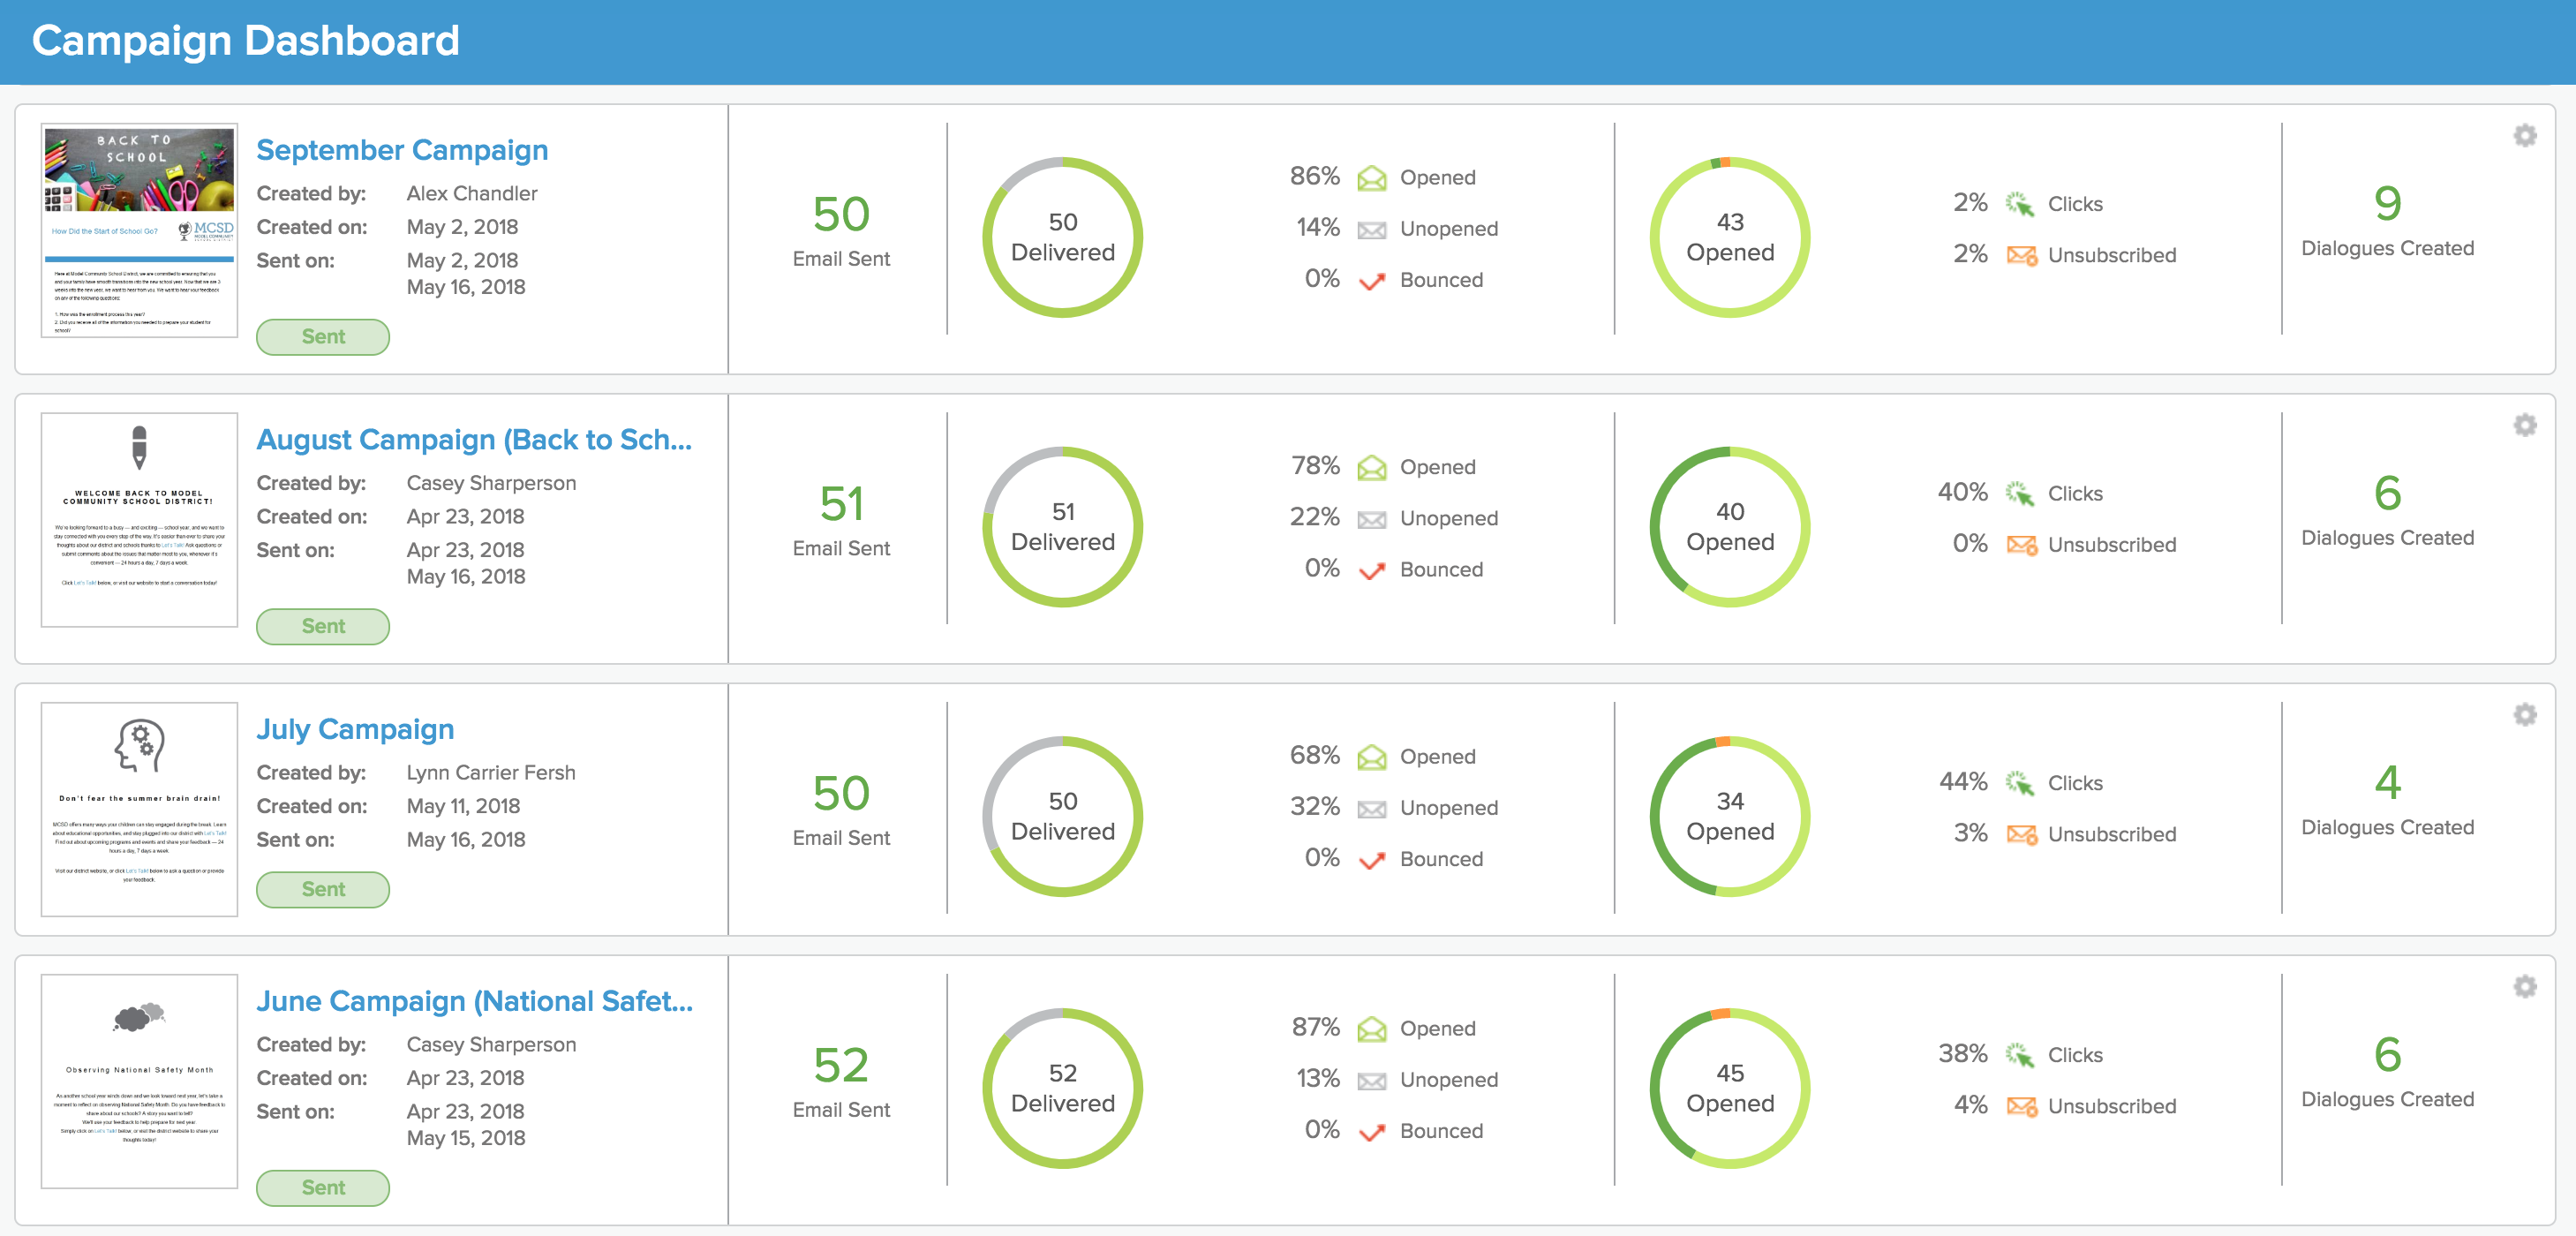
Additional things you can do:
- Click on the Tickets Created number to open up an inbox of all tickets that came in from that specific campaign
- Choose which campaigns to display by clicking the drop-down under Overview and selecting a campaign. By default, all campaigns are displayed.
- Click the gear wheel to the right of each campaign to View Full Report, Download Report, Resend Campaign, or Delete Campaign.
Campaigns go out, Tickets come in – an all-in-one system for two-way communication!