Bulk Edit IT Assets

Generic selectors
Exact matches only
Search in title
Search in content
Post Type Selectors

Build a custom list of assets by searching, pasting, or scanning — then run bulk operations on them


Overview

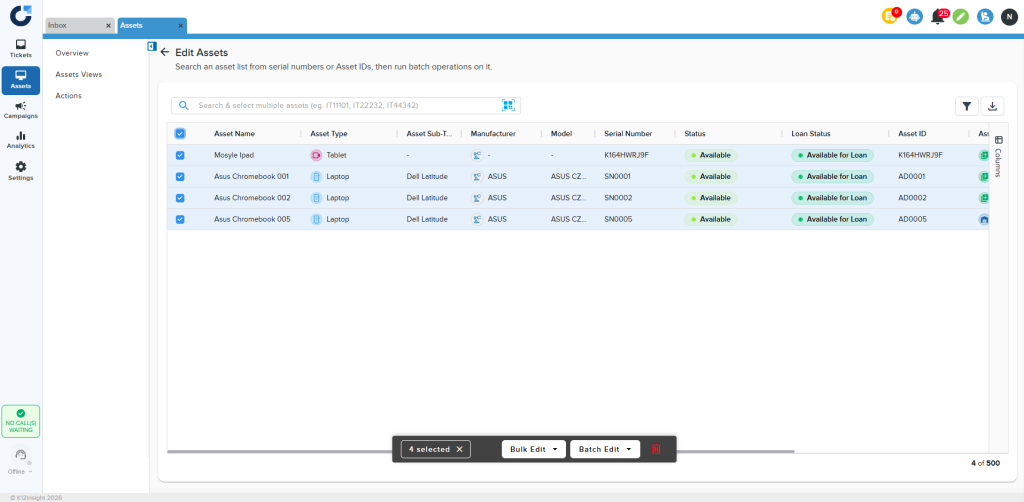
Edit Assets lets you assemble an exact list of assets without building filters. You can search for assets one at a time, paste many Asset IDs or Serial Numbers at once, or scan them with a connected scanner. Once your list is ready, you can filter it, export it, and run a bulk or batch edit on the assets you select.

There are three ways to add assets to your list:

  • Search: type an Asset ID or Serial Number and pick from the suggestions.
  • Bulk paste: paste many Asset IDs or Serial Numbers separated by commas, tabs, or new lines.
  • Scan: scan assets with a hardware scanner connected to your computer.

Lorem ipsum dolor sit amet, consectetur adipiscing elit. Ut elit tellus, luctus nec ullamcorper mattis, pulvinar dapibus leo.

How to use it

Open the Edit Assets view

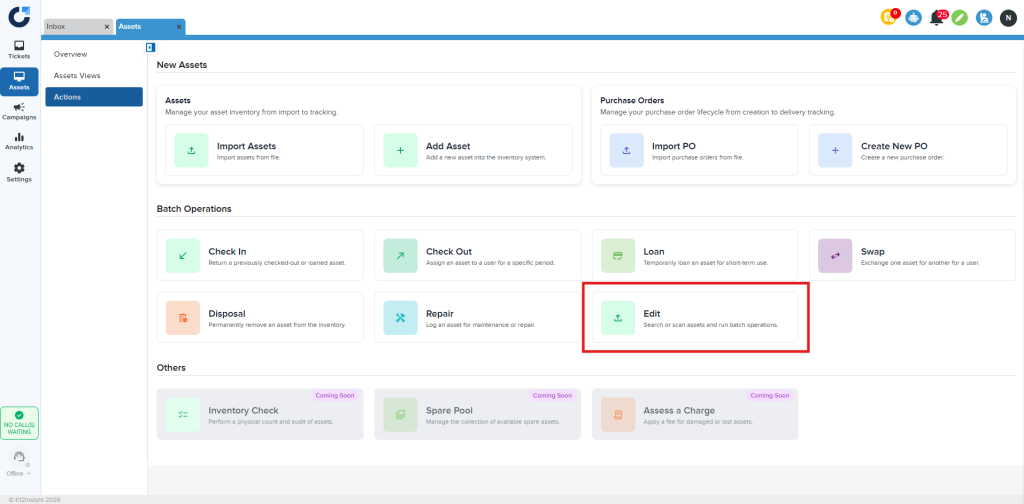
  1. From the left menu, open Assets and go to the Actions page.
  2. In the Batch Operations section, click Edit.
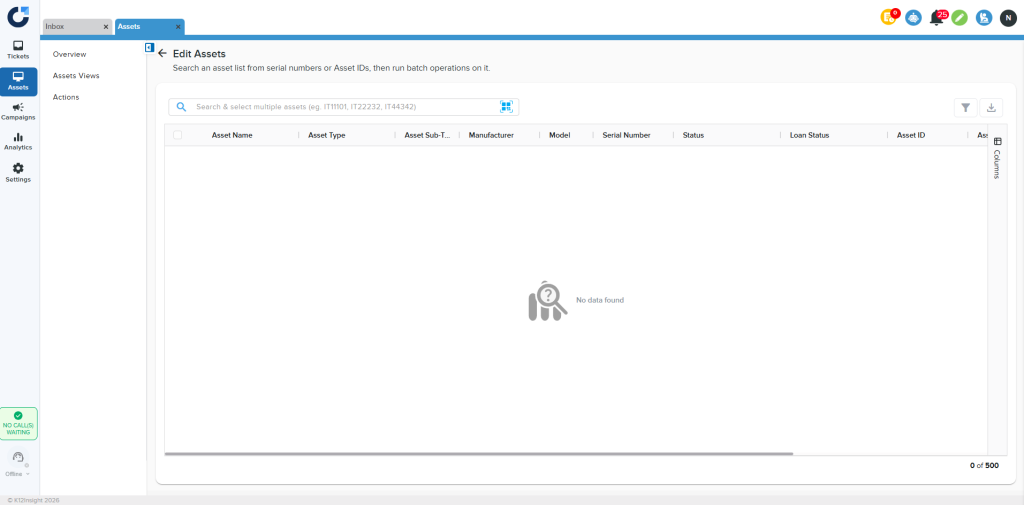
  3. The Edit Assets view opens with an empty list, ready for you to add assets.

Add a single asset by searching

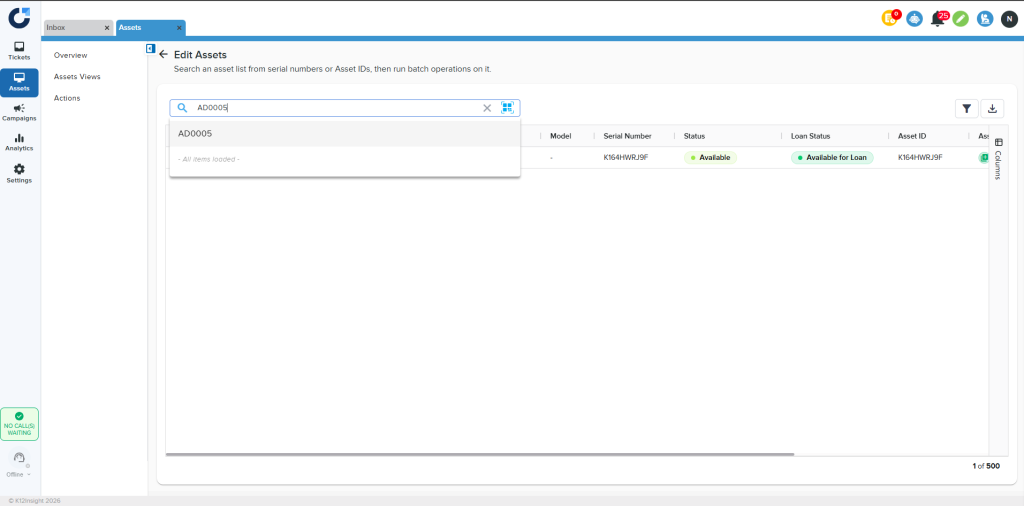
  1. Click into the Search field.
  2. Type part of an Asset ID or Serial Number — Onflo matches on both.
  3. Select the asset from the suggestions to add it to your list.

Add multiple assets at once

To add many assets in one go, paste a list of identifiers into the search field.

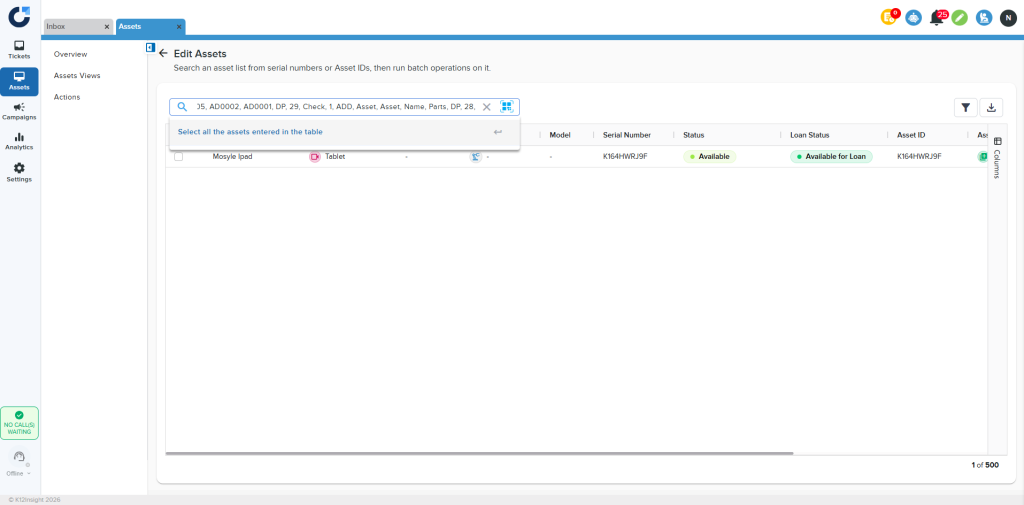
  1. Copy your Asset IDs or Serial Numbers. They can be separated by commas, tabs, or new lines.
  2. Paste them into the Search field. Onflo trims extra spaces and ignores letter case.
  3. Click Select all the assets entered in the table, or press Enter, to add every match at once.

If the same identifier appears more than once, it is added to the list only once.

Review IDs that didn’t match

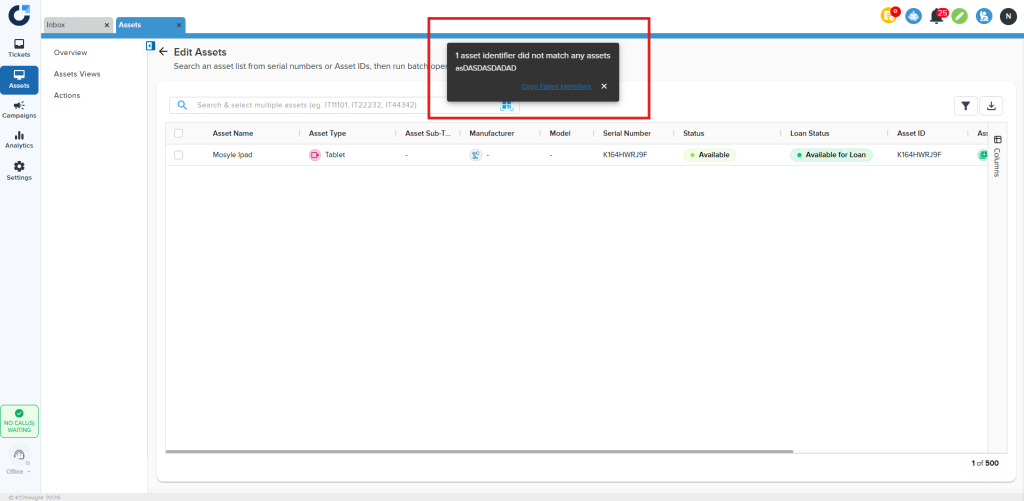
If any entries don’t match an asset, Onflo shows a message listing them. This message stays on screen until you close it, so nothing slips past you. Every asset that did match is still added to your list.

From the message you can:

  • Copy a single ID to look into it, or
  • Copy all the unmatched IDs at once as a comma-separated list to correct your source.

Scan assets into your list

  1. Make sure your scanner is connected to your computer.
  2. Click the scan button next to the search field.
  3. Scan an asset — it is added to your list automatically, with no extra step.
  4. Continue scanning as many assets as you need.

If you scan an asset that is already in your list, Onflo lets you know instead of adding a duplicate.

Filter, export, and page through your list

Once your list has assets, you can refine and save it:

  • Use the filter to narrow the list further.
  • Export the list to CSV or Excel (XLSX).
  • Lists show up to 500 assets.
  • Select assets and run a bulk or batch edit
  1. Tick the checkbox on each asset you want, or use the header checkbox to select them all.
  2. In the selection bar, choose Bulk Edit or Batch Edit.
  3. Follow the prompts to apply your changes to all selected assets at once.

Related Post

Webhooks

Automatically send Onflo ticket and asset information to your other business systems. Overview Webhooks let Onflo automatically send information to another system the moment something happens. When a ticket is created or an asset is added, Onflo can instantly push

Read More ➜

API Tokens

How customers create and manage the tokens that let their software connect to the Onflo API Overview API Tokens is a feature in Onflo Settings that lets a customer generate a secure key which their own software can use to

Read More ➜

Community Promotion Toolkit

Ideas and ready-to-use templates to help you introduce or reintroduce Onflo to your community. Choose Your Approach There’s more than one way to introduce your service desk to your community. The approach you choose will depend on your district’s communication

Read More ➜