If you’re having trouble using your microphone with our application, follow these steps to ensure Chrome is set to allow microphone access:
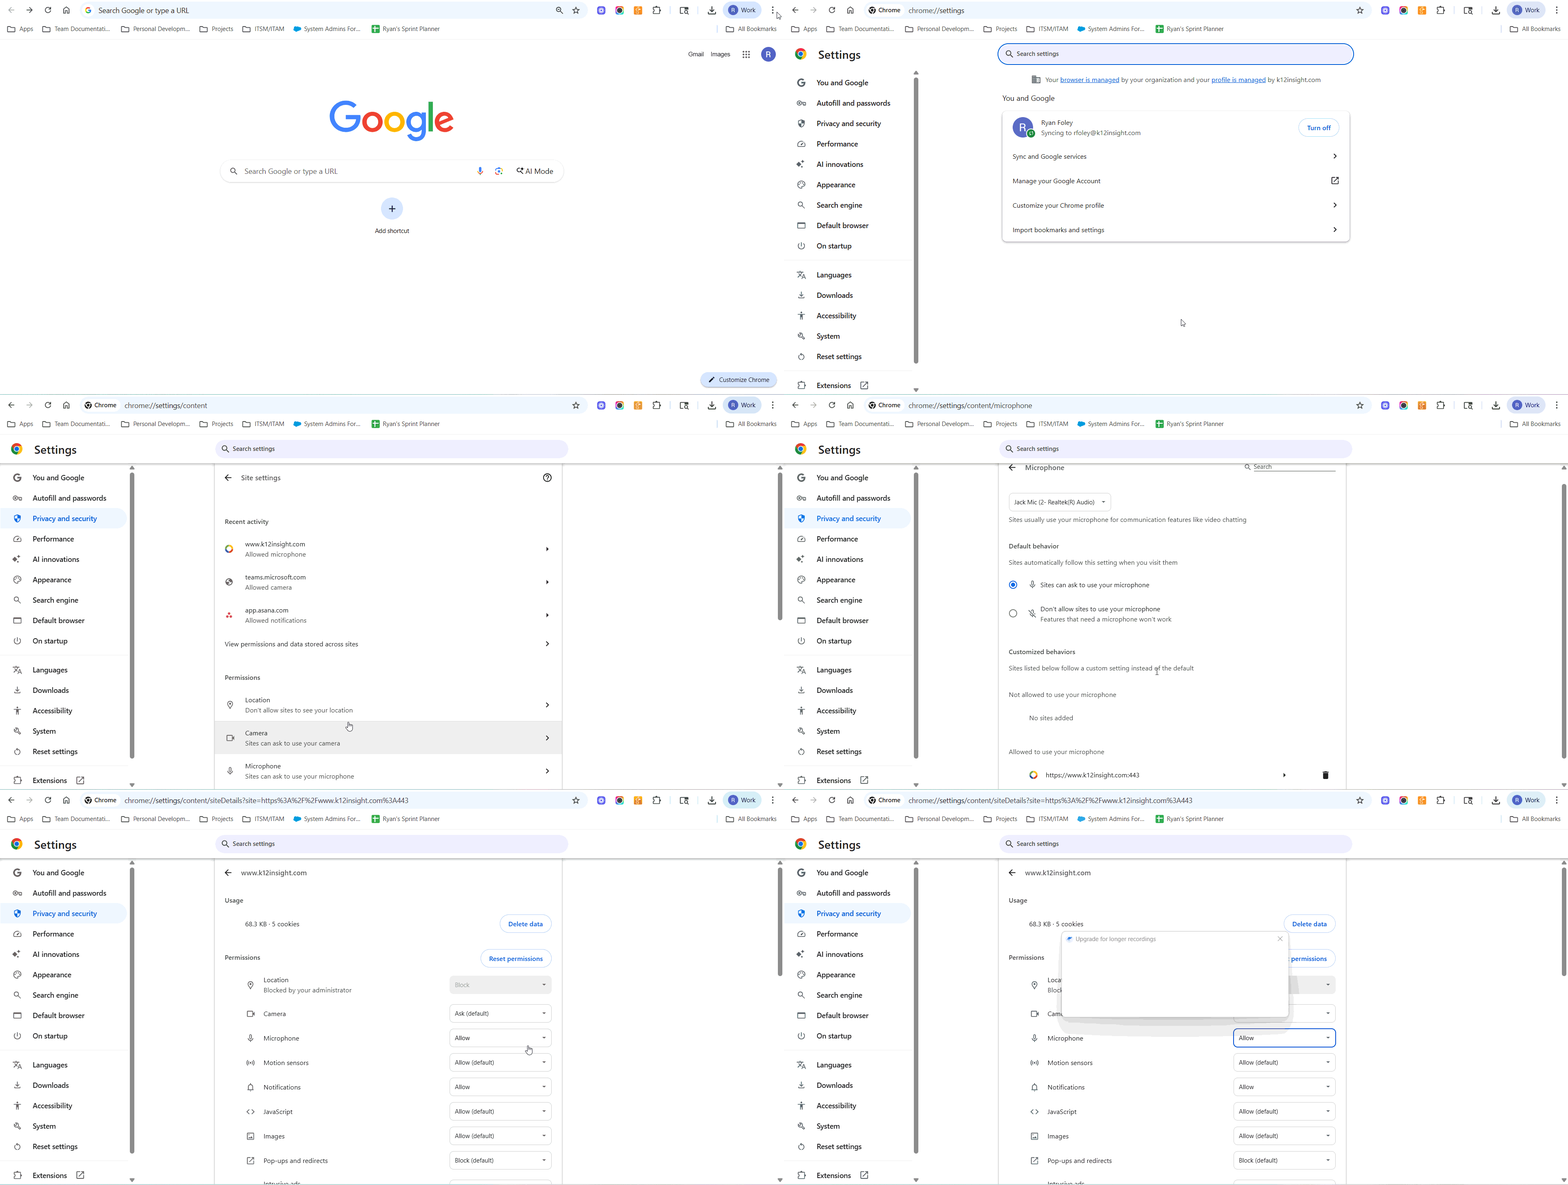
Step 1: Open Chrome Settings
- Click the three dots menu in the top-right corner of Chrome.
- Select Settings.
Step 2: Check Site Permissions
- In the left menu, click Privacy and security.
- Click Site settings.
- Under Permissions, click Microphone.
Step 3: Select Your Microphone
- From the dropdown at the top, choose the correct microphone device (if you have more than one).
- Under Allowed to use your microphone, make sure k12insight.com appears.
- If it’s under Not allowed, click k12insight.com and change the setting to Allow.
- If it’s under Not allowed, click k12insight.com and change the setting to Allow.
Step 4: Enable Access from the Address Bar
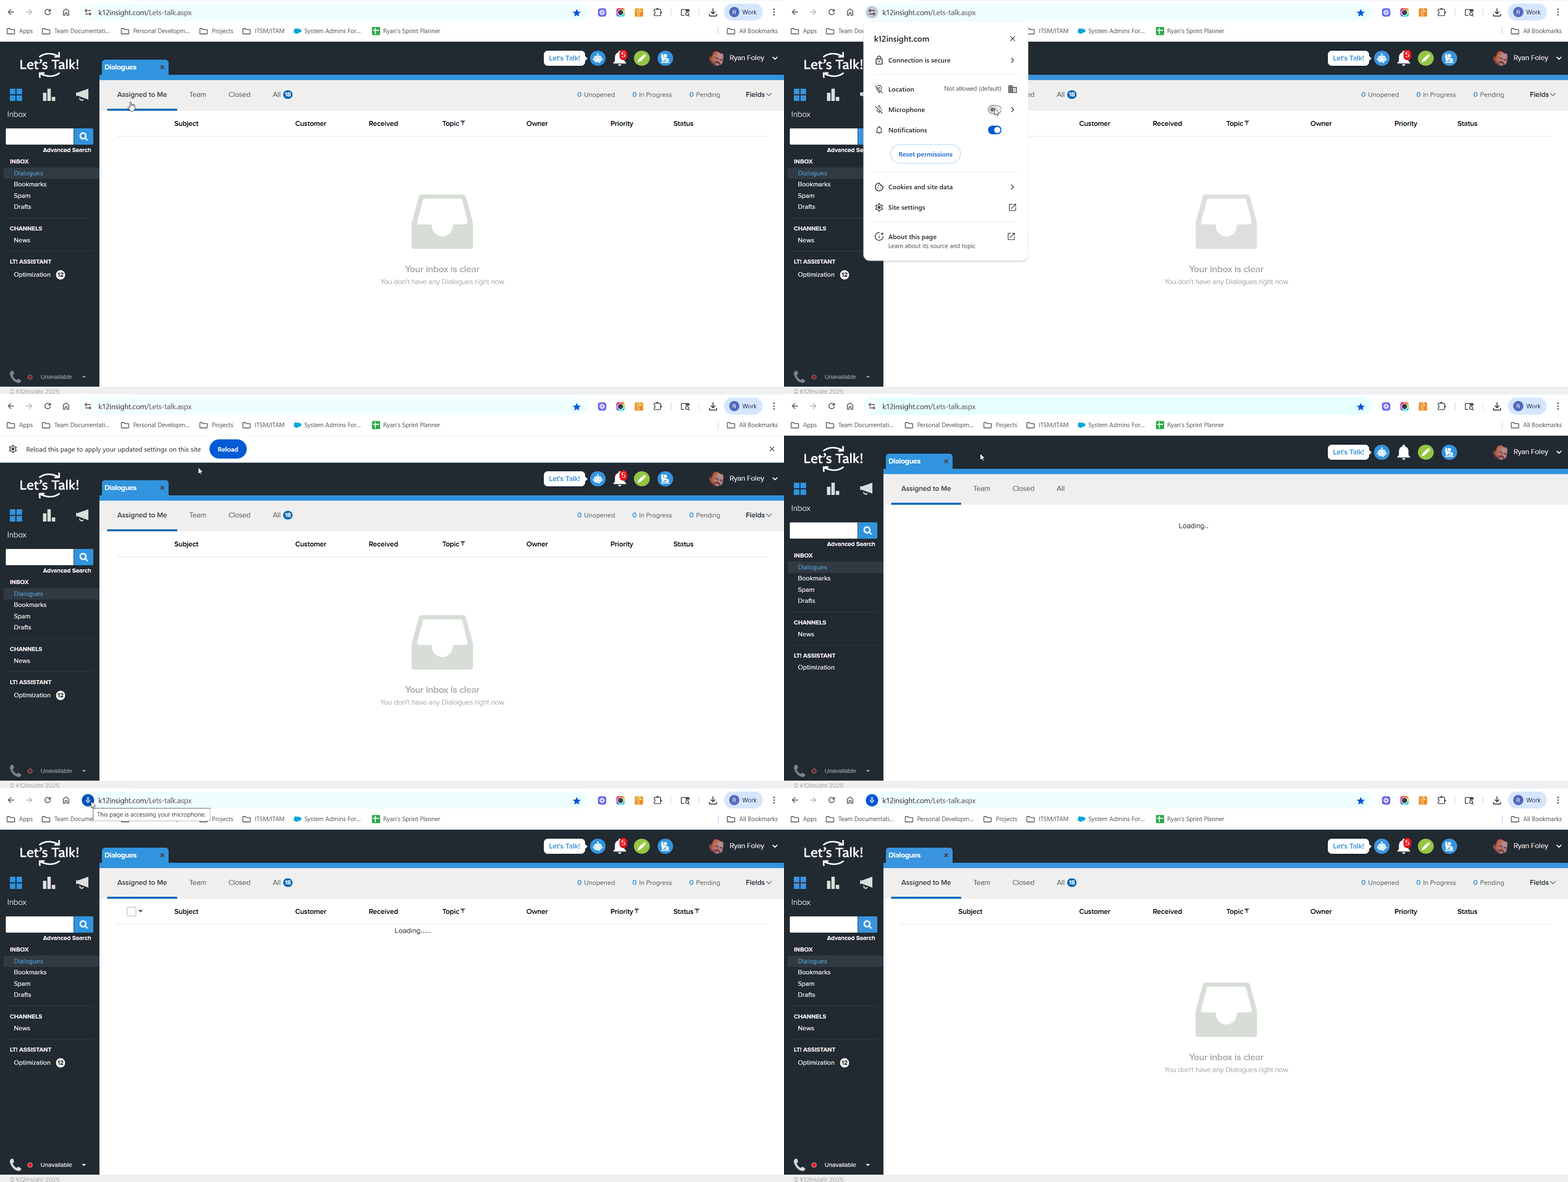
When you are logged into Onflo - k12insight.com/lets-talk.apsx:
- Look for the microphone icon in the address bar.
- Click it and select Always allow for microphone access.
- Refresh the page.