
Accessing Email Settings
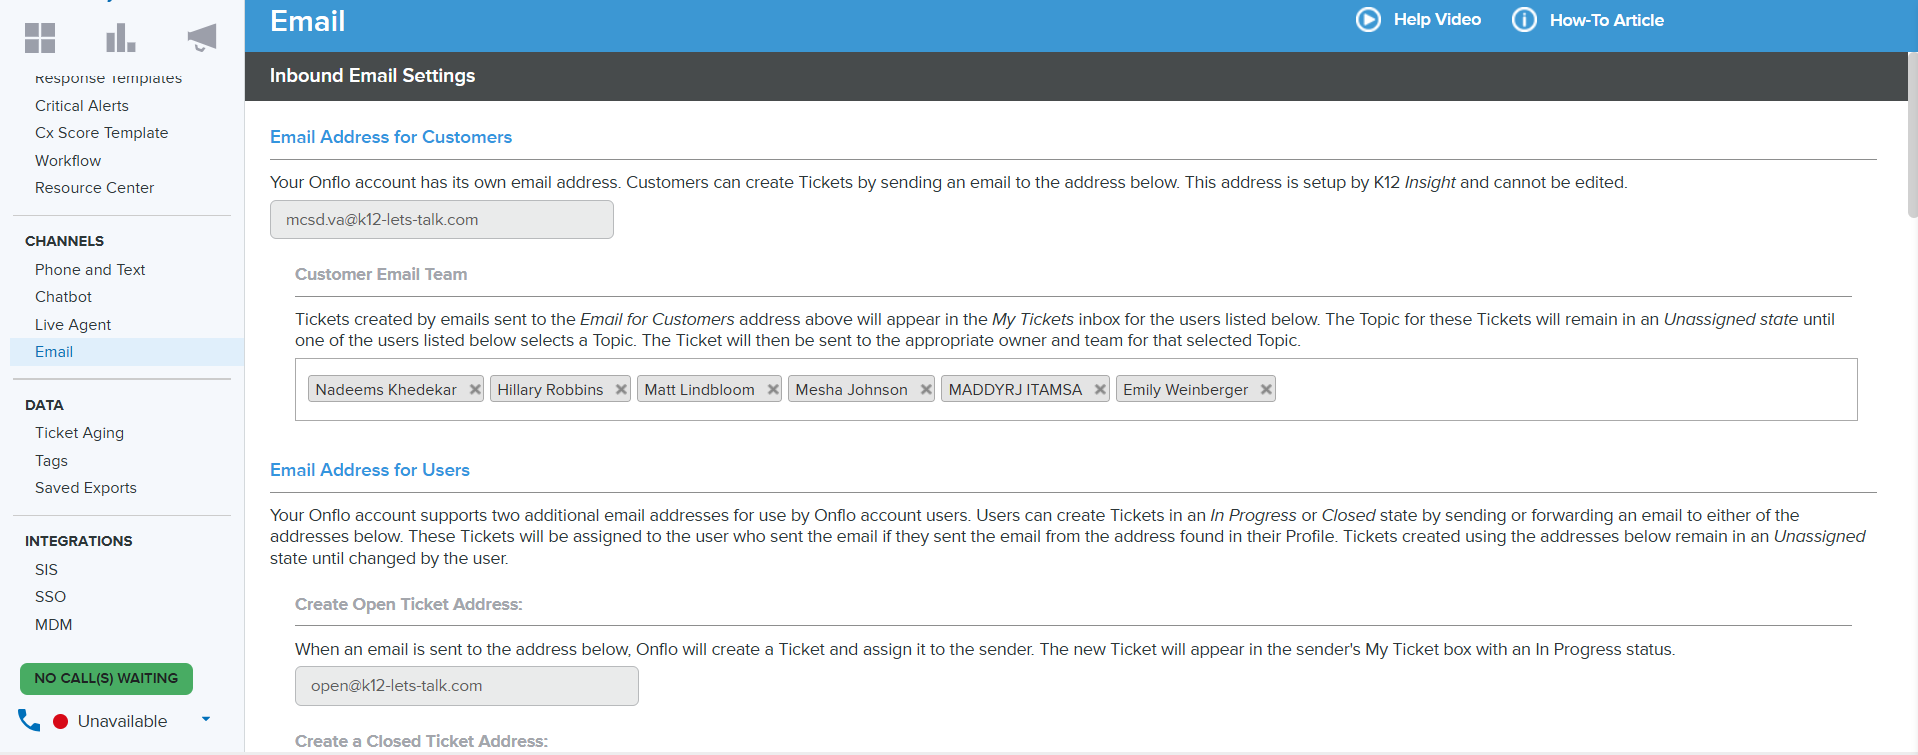
- On the Settings menu, click on Email under Channels.
Email address for users
- Under Email Address for Customers, you will see your customized email address for direct delivery to your Onflo account. This address is set up by K12 Insight and cannot be changed.
- Under Customer Email Team, list all Users who should have access to emails sent to this address.
- Email Team will always include system admin, but you can add non system admin as well
- No changes can or need to be made in the Email Address for Users section.
Outbound Email Settings
- Review the Outbound Email Settings section. Confirm whether replies to Customers should be sent from your district as a whole or from specific Users, as well as from whom notifications should be sent. Note: No changes can or need to be made to the email addresses in this section.
- To customize the appearance of the emails sent to Customers, click on Edit Customer Email Template. Here, you may customize the signature, change colors, and add or remove a logo. Click Save to confirm updates.
- To customize the appearance of the emails sent to Users, click on Edit User Email Template. Here, you may customize the signature and change colors. Click Save to confirm updates.
- Be sure to confirm all of your updates by clicking the green Save button in the top right corner.
Your Onflo (formerly Let's Talk) account is capable of capturing both directly delivered and forwarded emails. While all Users will be able to take advantage of forwarding emails, only those you identify as members of the Email Team will have access to emails directly delivered from Customers.
Accessing Email Settings
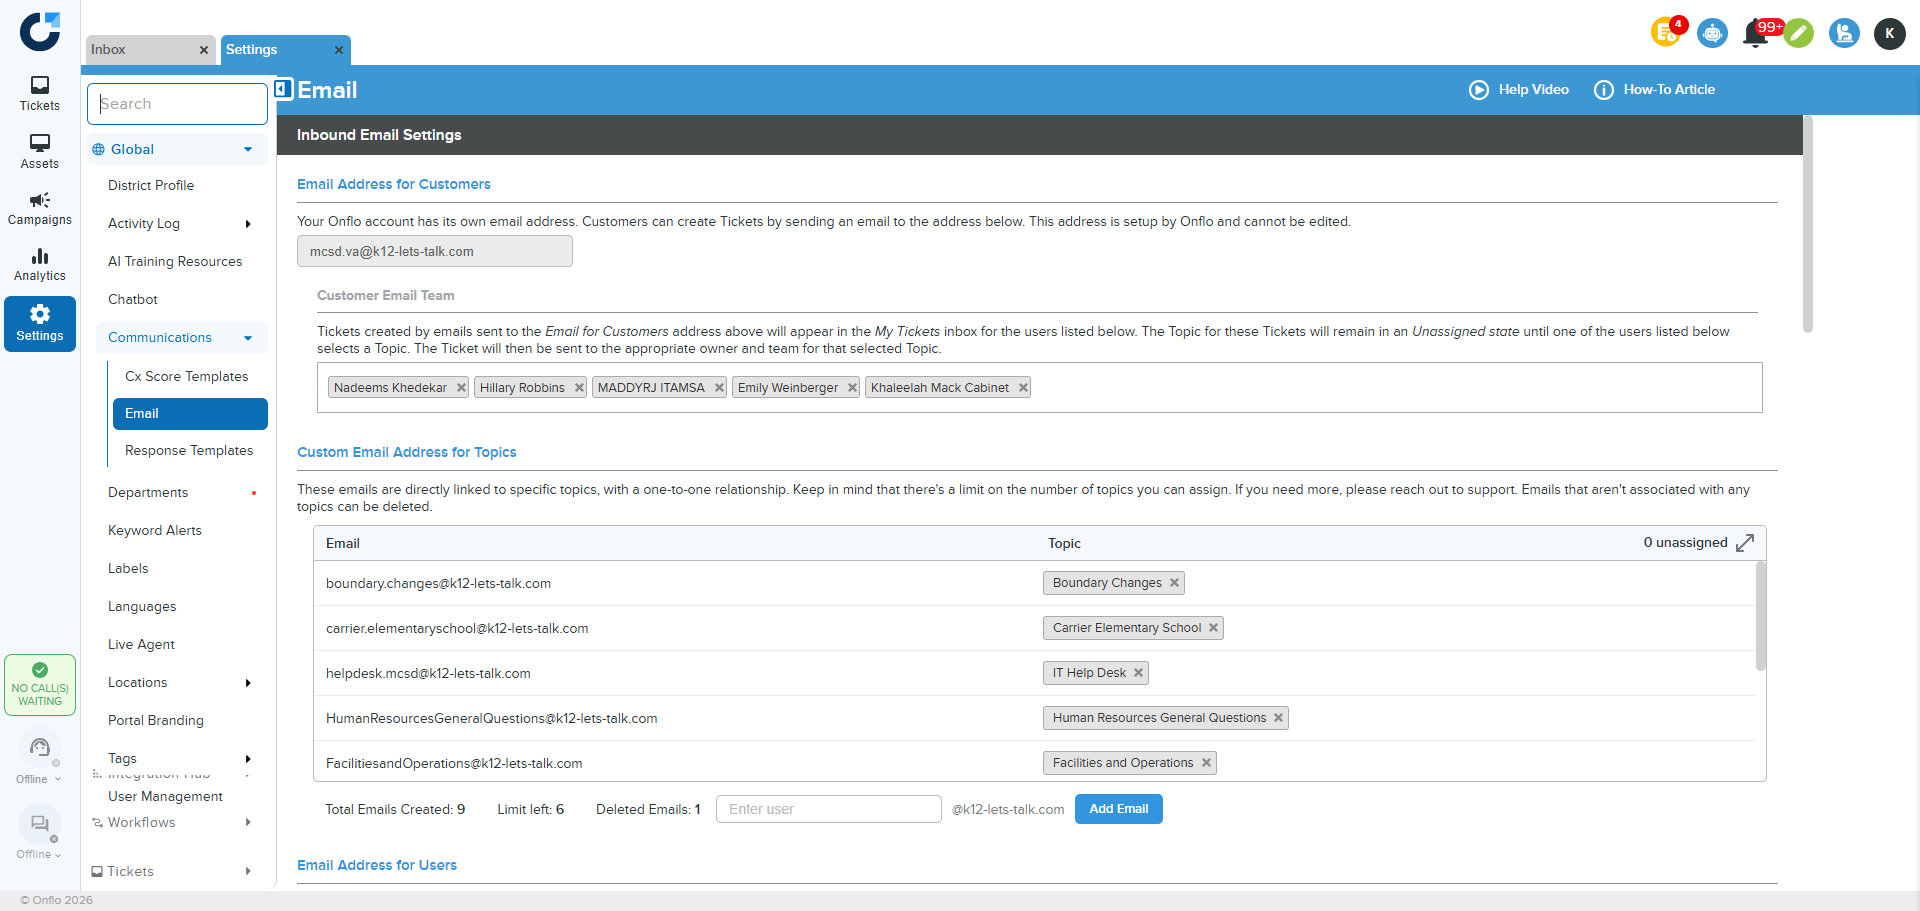
- On the Settings menu, click on Email under Communications.
Custom Email Addresses for Topics
A custom email address allows you to create an Onflo email address that is connected to a specific Topic. Emails sent to the address will automatically generate tickets in the designated Topic.
There are two ways you can use a custom Topic email address:
Publish the Onflo email address
You can share the Onflo email address directly with your community and encourage users to email that address when they need assistance. Emails sent to the address will create tickets in the associated Topic.
Forward an existing email address
You can configure an existing organizational email address to automatically forward incoming messages to the Onflo email address. Emails forwarded to Onflo will create tickets in the associated Topic, allowing you to continue promoting and using your existing email address while routing those requests into Onflo.
Email Address for Users
- Under Email Address for Customers, you will see your customized email address for direct delivery to your Onflo account. This address is set up by Onflo and cannot be changed.
- Under Customer Email Team, list all Users who should have access to emails sent to this address.
- Email Team will always include system admin, but you can add non‑system admin Users as well.
- No changes can or need to be made in the Email Address for Users section.
Outbound Email Settings
- Review the Outbound Email Settings section. Confirm whether replies to Customers should be sent from your district as a whole or from specific Users, as well as from whom notifications should be sent. Note: No changes can or need to be made to the email addresses in this section.
- To customize the appearance of the emails sent to Customers, click on Edit Customer Email Template. Here, you may customize the signature, change colors, and add or remove a logo. Click Save to confirm updates.
- To customize the appearance of the emails sent to Users, click on Edit User Email Template. Here, you may customize the signature and change colors. Click Save to confirm updates.
Be sure to confirm all of your updates by clicking the green Save button in the top right corner.